


My Store
NevBolt-3 NVMe Adapter for A2115 iMac 27" 2020
NevBolt-3 NVMe Adapter for A2115 iMac 27" 2020
Couldn't load pickup availability
What is it?
This is a DIY project intended for enthusiast with advanced soldering skills to add secondary storage by adding NVMe SSD to the iMac 27" 2020. By default Apple soldered the main storage(NANDs) to the logicboard, so you are stuck with 250GB then can't expand or upgrade it yourself to larger capacity. So this one time modification adds the 2nd storage(NVMe SSD). Modification for the first time requires soldering.
Other reason to install this to your iMac?
NVMe SSD is removable and upgradable to any capacity yourself. You are not limited to internal 250GB storage anymore.
Why did we make it?
We built it for fun, the original thoughts when this project started was just because we want to have an ideal iMac that we can use/upgrade for ourselves. We also create it just to test our soldering skills and manufacturing precision.
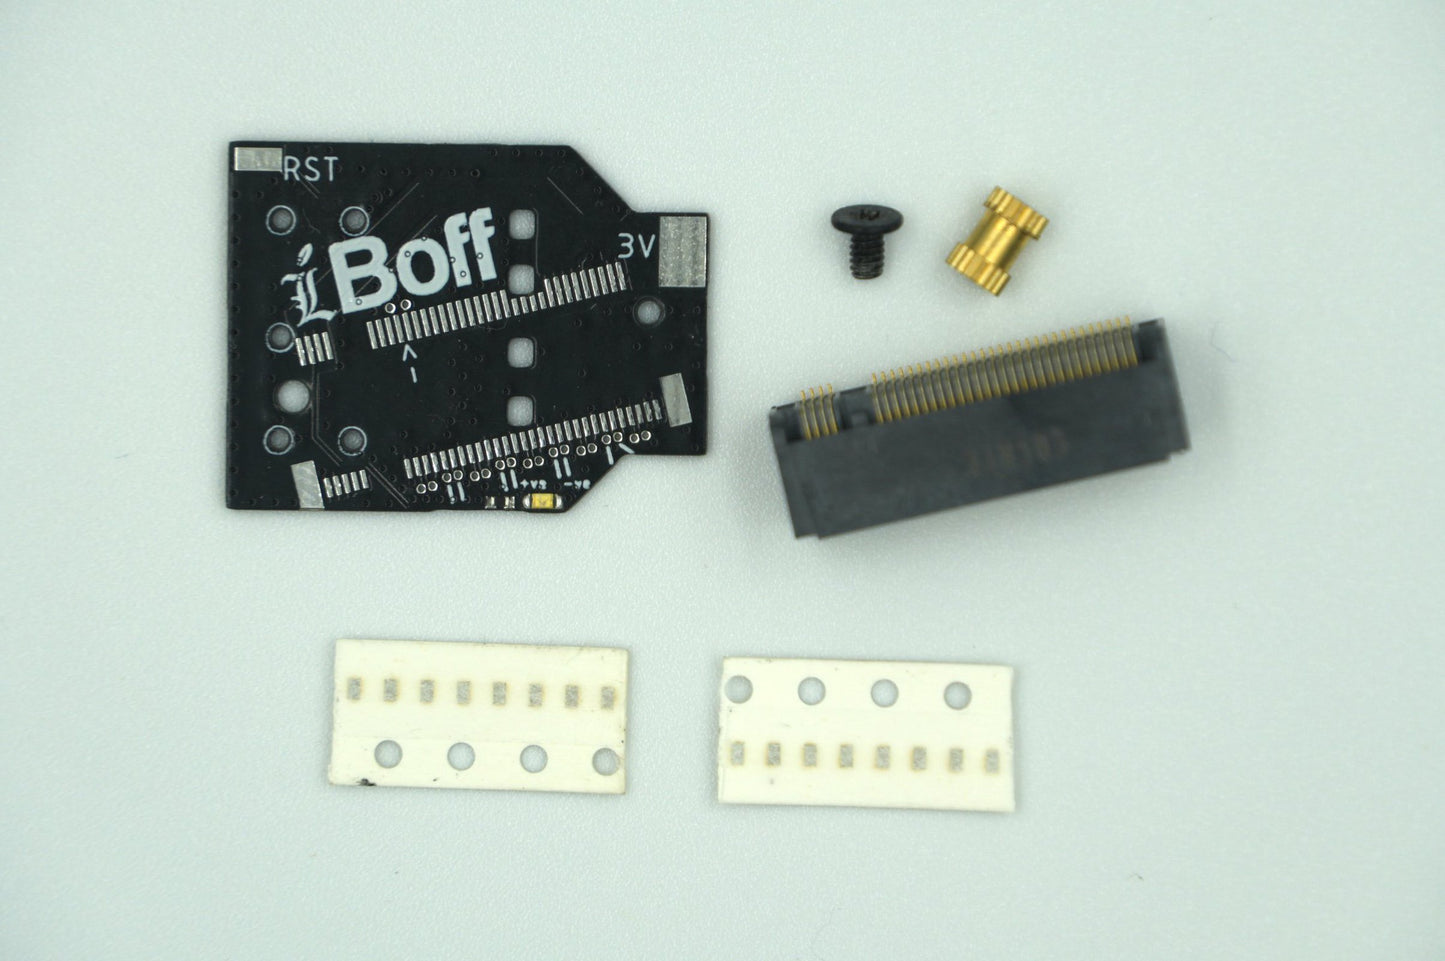
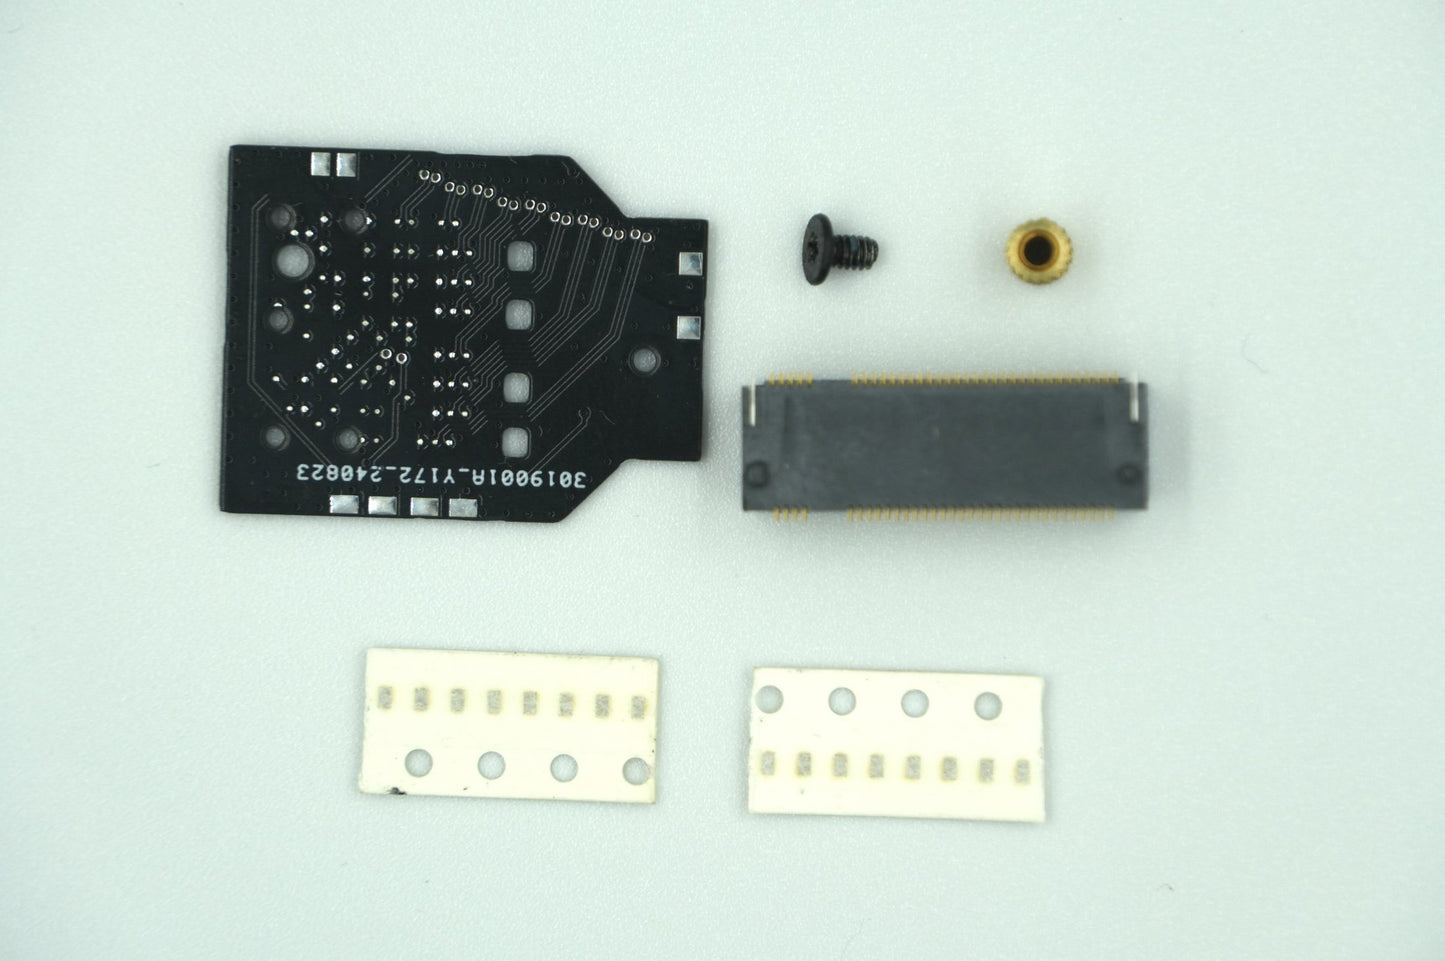
What is included in the kit?
- 1x NevBolt-3 adapter
- 1x M.2 Female Port
- 1x NVMe Screw Standoff
- 1x NVMe Screw
- 8x 0.22uF 0201 Capacitors
- 8x 0201 Inductors What you see from the pictures are what you will receive.
Quick Guide How To Install it:
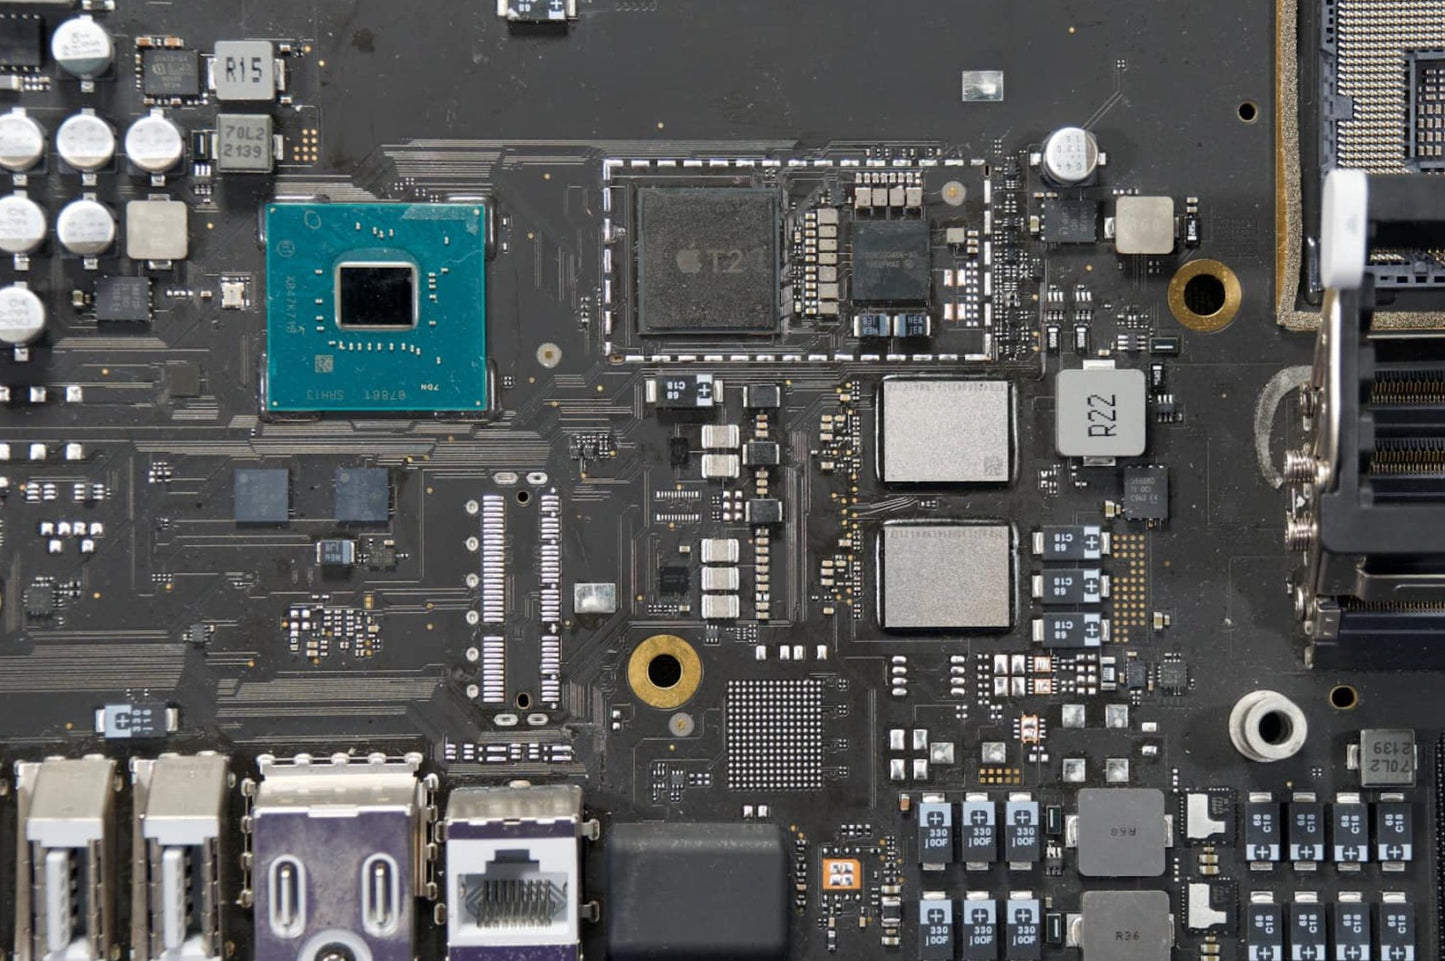
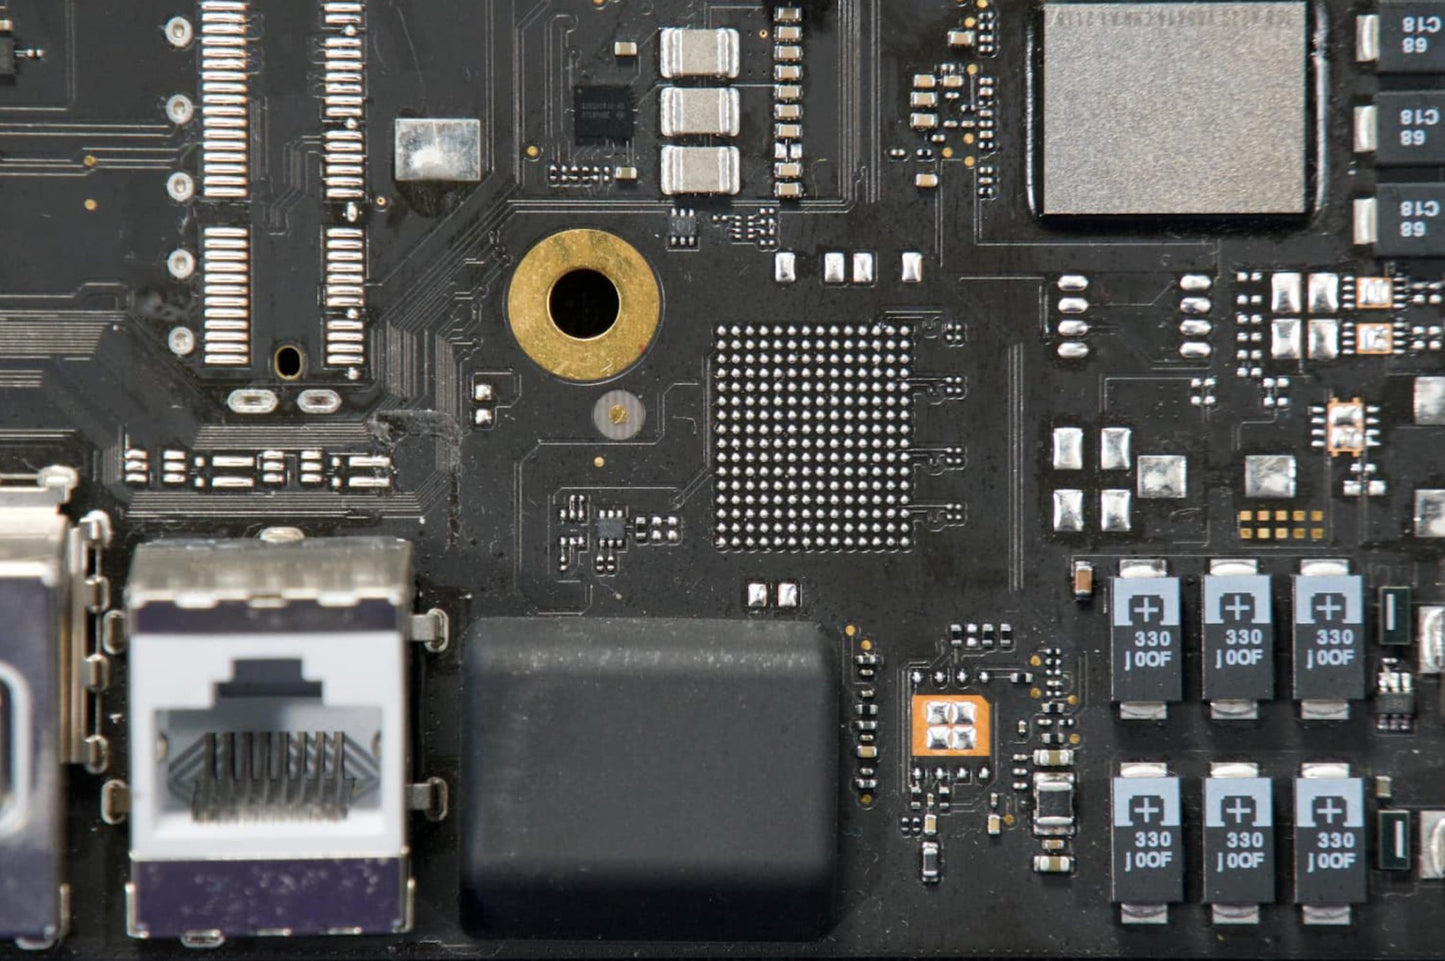
- Your iMac MUST NOT have 10GBe Ethernet configuration. This modification is possible because it replaces the empty footprint of the 10GBe Ethernet IC. So it will only work if your iMac has the base 1GBe Ethernet(which is common). With proper skills, this mod can be performed without taking off the CPU's heatsink. You can take it off if you want.
- Download schematic (pdf) & boardview (brd) for 820-01823 or 820-01779 (iMac A2115), download Openboardviewer software to open BRD file.
- In the boardviewer, locate these 8x capacitors, C9950, C9951, C9952, C9953, C9954, C9955, C9956, C9957.
- Take the supplied 0201 inductors from the Kit, and solder them all to the above capacitors footprint using hot air gun. You might want to tint the cap's pads with leaded solder + flux with the soldering iron, to make stuffing process easier.
- After you done that, next, in the boardviewer, locate these 8x capacitors near the PCH IC, C9940, C9941, C9942, C9943, C9944, C9945, C9946, C9947.
- Take the supplied 0.22uF capacitors (0201) from the Kit, and solder them all to the above 8x capacitors footprint using hot air gun. You might want to tint the cap's pads with leaded solder + flux with the soldering iron, to make stuffing process easier.
- After you done that, next, in the boardviewer, locate these 2x resistors, RA054 & RA055. These are for CLK100M, so stuff both of them with the extra Inductors we included in the Kit.
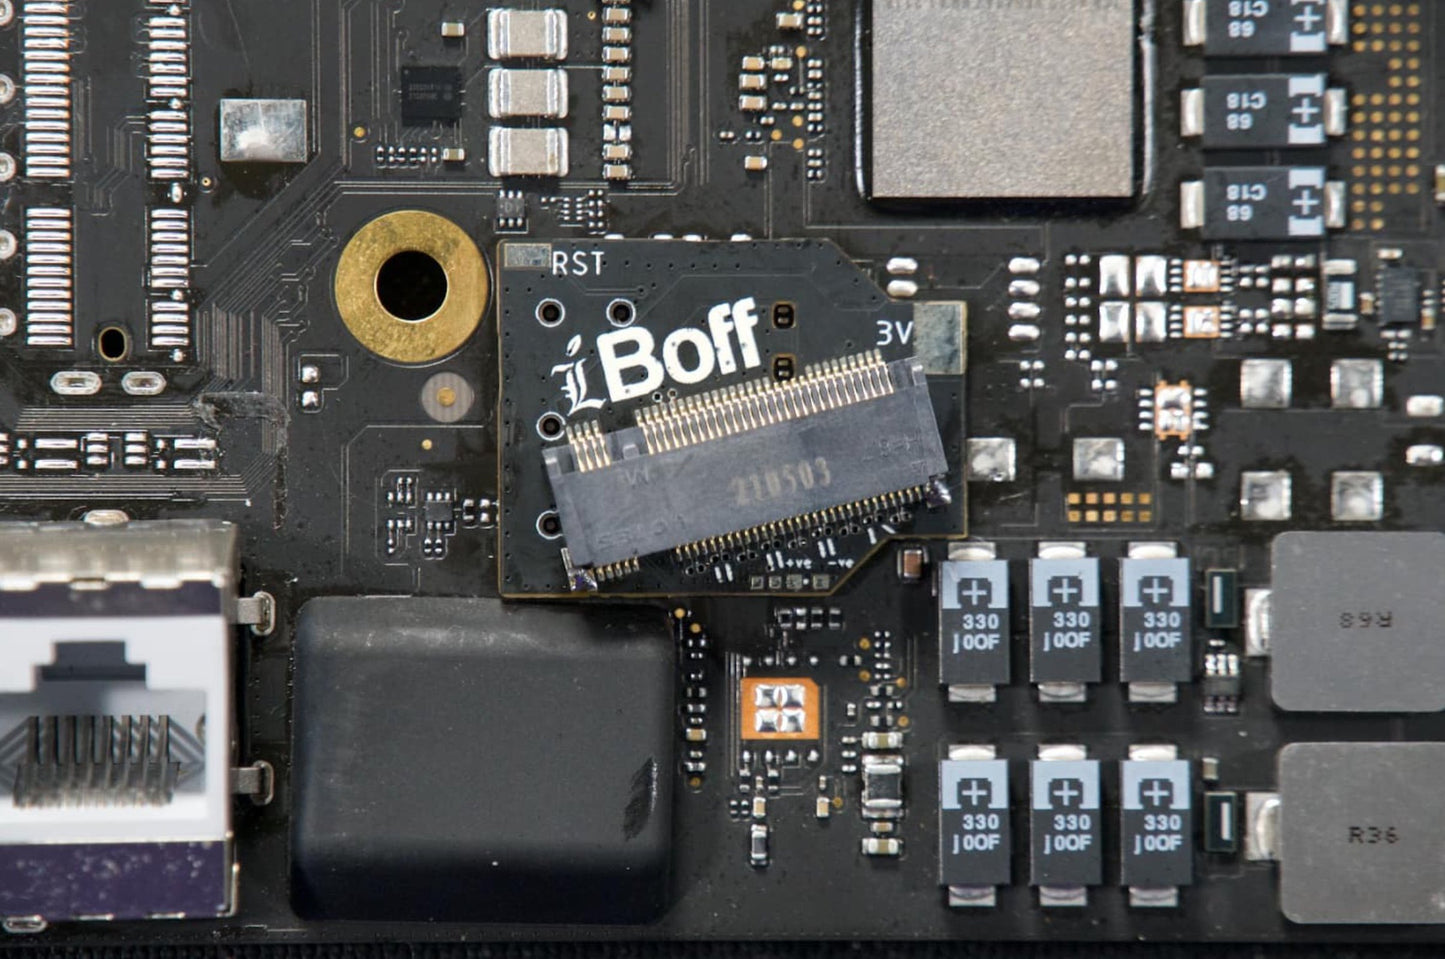
- Now go to U9700 (10GBe Ethernet pads), apply a thin layer of flux to the BGA pads, and align your NevBolt-3 adapter on the BGA pads. Now try to adjust the NevBolt-3 holes to match the BGA pads on the logicboard.
- Once the NevBolt-3 adapter aligned with the BGA pads, you can begin to solder it with hot air gun. Please note that; you need to preheat the local area on the logic board first, and only then you can target the heat to the NevBolt-3 adapter. This is to ensure that the solder balls are properly fused to the pads. (insufficient heat can cause cold joints or worse delamination). You can use bottom preheater like Jovy RE8500 to add base heat to the iMac logicboard.
- Once you have perfectly soldered the adapter, check the ball joints from the side whether its properly aligned or not, or whether it fuses properly with pads.
- Take the supplied M.2 NVMe connector from the Kit, and solder it to the top of the NevBolt-3 adapter using soldering iron.
- On top of the NevBolt-3 Adapter, you can see 3V pad, so take a thick enamelled wire or any coated wire then solder it to the 3V pad, connecting to the R9955 pin on the logicboard. It is the PP3V3_G3H_ENET power.
- Then on top of the NevBolt-3 Adapter, you can see RST pad. Take a 0.1mm enamelled wire then solder it to the RST pad, and connect it to the TBTP755 near the R2084. This is actually PLT_RST_L signal for Platform Reset.
- You can cover the wire with conformal coating if you want.
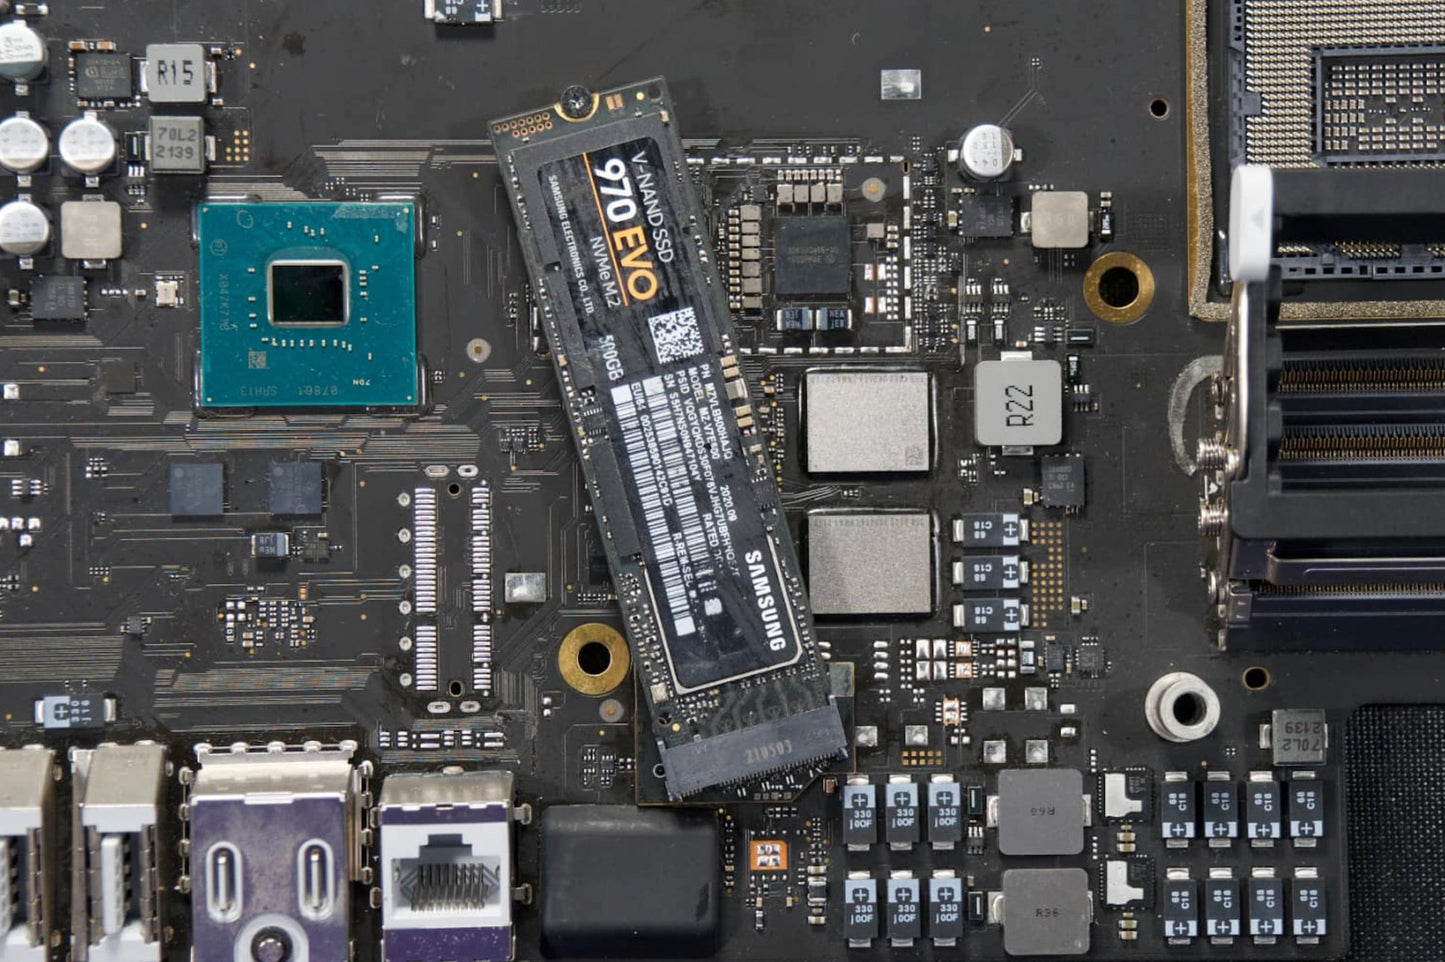
- Now you can install the NVMe SSD into the M.2 socket, then you can mark the position for the Screw Standoff using marker or tape.
- The marking should be visible on the surface of logicboard, directly on top of GND plane. But right now you need to remove the top solder mask using the small grinder/knife to expose the GND copper. Make sure to keep the removal area minimal just enough to solder Screw Standoff.
- Then you can begin to apply flux and leaded solder to the exposed/grinded top layer (GND), and solder the Screw Standoff to that exposed pad using Hot Air Gun.
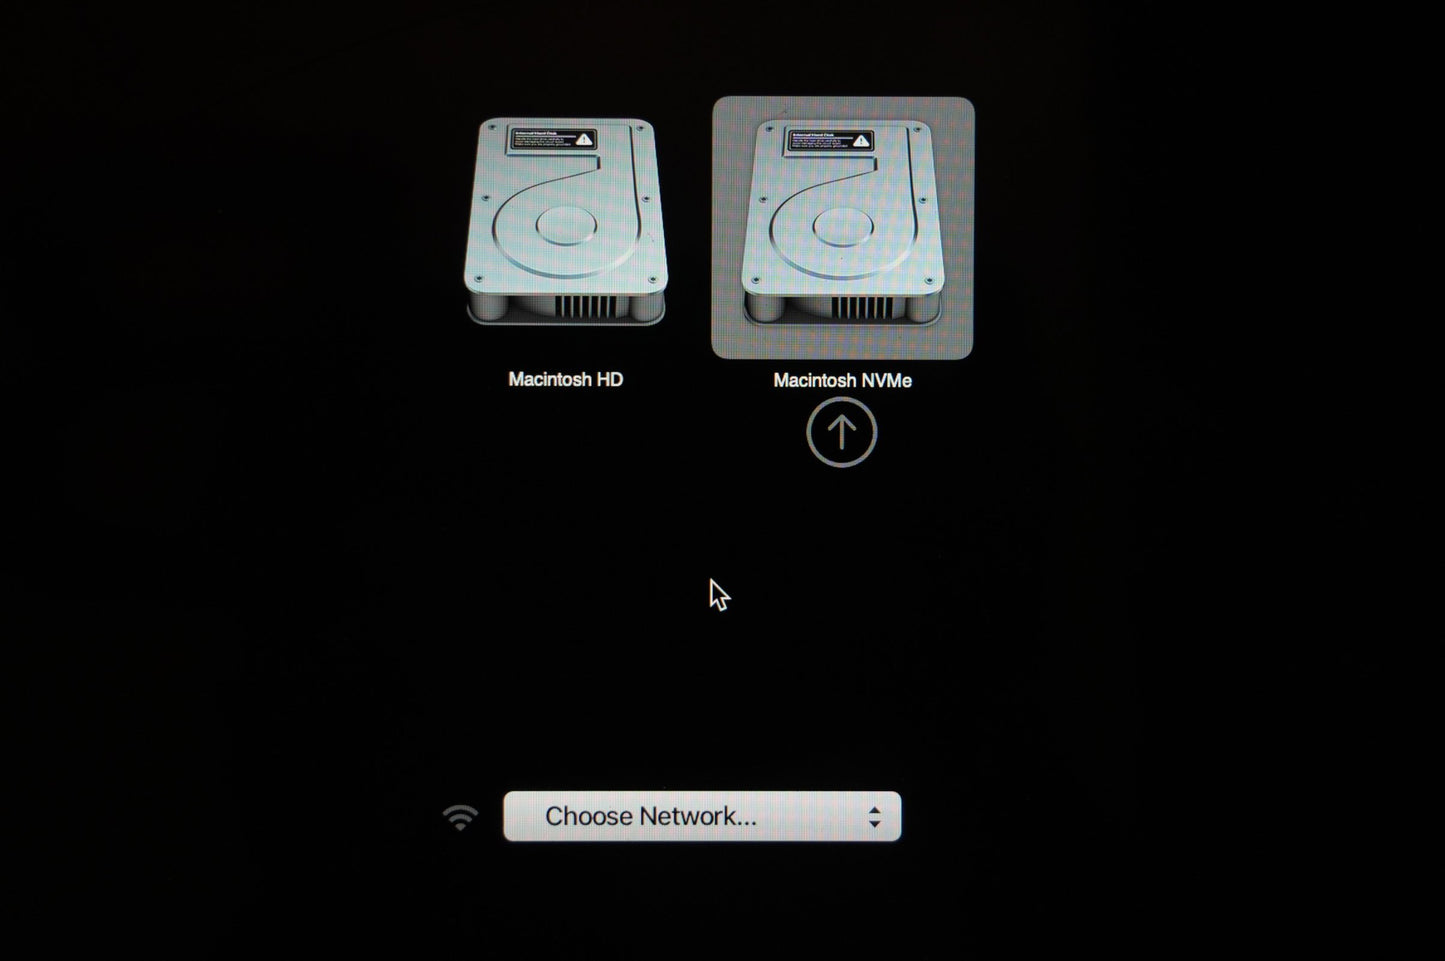
- You're done, test your NVMe SSD by installing it to the socket and boot your iMac, your Mac will have 2 SSDs now.
- Contact us if you have any issues!
You want us to solder/install it to your iMac?
Contact our email at main.iboff@gmail.com or FaceBook at https://www.facebook.com/Logicboard.Macbook/
Custom & Duty Fee:
All international buyers are responsible to pay any custom fee or import tax that might be applied at his/her country. Please contact your local custom office/Fedex for more details about custom process and import tax. We do not accept any return & claim because of your country’s custom regulation rules / delays / fee! You are responsible for any VAT, tariff, duty, taxes, handling fees, brokerage charges, customs clearance charges, etc. that might be required by your country for importing goods! There is no way for iBoffRCC (the shipper) to predict your country's customs/fee habits, and if you can’t pay the required fees resulting in parcel disposal / delay / return - WE WILL NOT ISSUE ANY REFUND.
MacBook, iPhone, iPad, Mac Mini, iMac, Mac Pro, Apple TV and Apple are trademarks of Apple Inc.
Share